
Star Wars Outlaws Guide: The Safecracker Quest Walkthrough & Stealth Tips
Navigating the galaxy's criminal underworld in Star Wars Outlaws isn't just about piloting a fast ship; it often requires cunning and subterfuge. Just ask Kay Vess during the pivotal 'The Safecracker' quest. She's made a deal with the formidable Queen Ashiga to retrieve a valuable relic from the clutches of Crimson Dawn. But here's the catch: the relic is secured deep within a Crimson Dawn stronghold called the Wellspring. Now, you might think, 'If Kay has built up a solid reputation with the syndicate, can't she just walk in the front door?' That's a logical assumption, but the Wellspring operates under its own rules—it's a Restricted Area for everyone, regardless of reputation. So, how does a savvy outlaw like Kay pull off this heist? The answer lies not in force, but in stealth and a keen eye for environmental details.
Finding the Secret Entrance
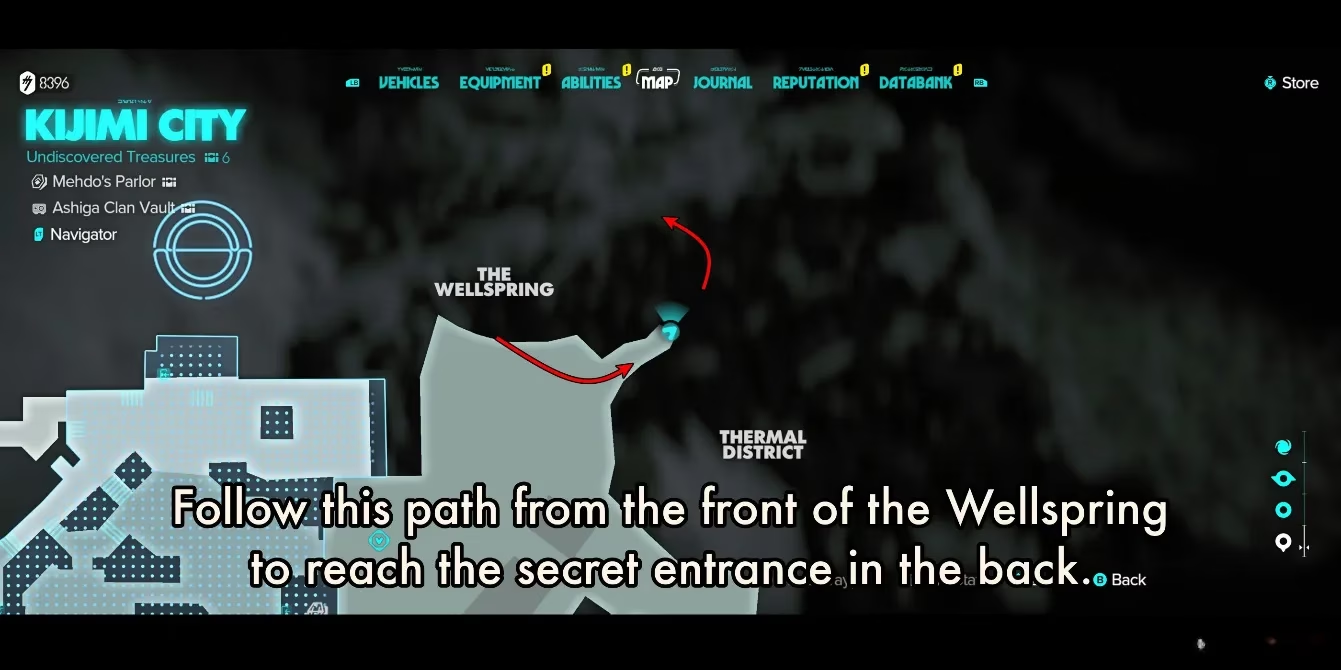
Since the front door is a hard 'no,' Kay's only viable option is to find an alternative point of entry. The journey begins at the imposing main entrance, where guards will promptly inform her the area is off-limits. Turning away, the key is to look east. A small, easily missed stone path leads across a tranquil pond, winding around the side of the building. Following this path reveals the first major clue: a section of broken wall. It's a tight squeeze, but Kay can just fit through, entering a secluded back area of the Wellspring complex. From here, the path to the interior becomes clear. A small pit in the ground holds the next secret—an open ventilation shaft. This is the ticket inside. Kay must enter the vent, navigate its confines, and climb a ladder to emerge into another shaft. This network eventually leads to an opening above the kitchen. A careful drop lands her right in the heart of the enemy's lair, all without raising a single alarm.
Infiltrating the Wellspring & Locating the Relic
Successfully entering the building is only half the battle. The interior is heavily patrolled by Crimson Dawn guards who will become immediately hostile if they spot Kay. The primary objective is clear: steal the Ashiga relic from its display in the main hall. But it's not just sitting out in the open; it's protected by a powerful energy barrier. So, what's the first step to claiming the prize? Kay needs to find a way to disable that barrier.
Upon exiting the kitchen, players will encounter their first guard. This is a critical moment to set the tone for the entire infiltration. Using Kay's blaster in Stun mode is highly recommended here, as it's a silent takedown method. From there, using the Data Spike tool to bypass locked doors is essential. The main hall is a two-story space with the relic prominently displayed on the lower level. However, the control terminal for the energy barrier isn't down there with it—it's strategically located upstairs.
Navigating the Upper Floor & Disabling the Barrier
The upper floor presents a significant stealth challenge. Guards patrol in pairs and small groups, making silent passage difficult. For players committed to a non-lethal or stealthy approach, a combination of tools is key:
-
Stun Blaster: Perfect for incapacitating one target silently from a distance.
-
Nix's Distractions: Kay's loyal companion Nix can be commanded to pester or attack an enemy, creating an opening for a takedown.
-
Stealth Takedowns: The classic close-quarters option when an enemy is isolated.
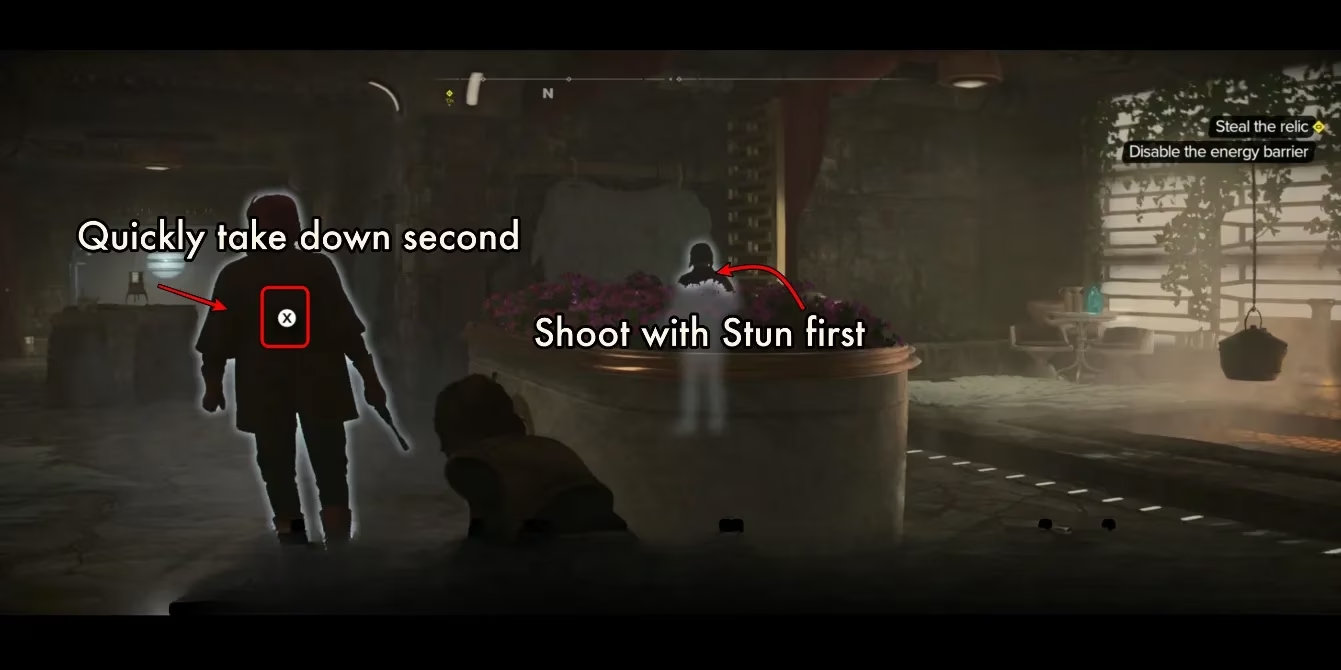
A common tactic when facing two enemies is to stun one and immediately perform a takedown on the other before they can react. The goal is to work your way slowly along the outer edge of the second-floor balcony towards the far end, just before the stairs lead back down. Here, you'll find a locked control room. Using the Data Spike to enter reveals the crucial terminal. This is where Kay must employ her slicing skills to hack the system and finally disable the energy barrier protecting the relic.
Securing the Prize and Making an Escape
With the barrier down, the path to the relic is clear—but the danger is not. Kay must now descend to the main floor. This area introduces a new threat: security droids. It's important to remember that these mechanical sentries are immune to stun blasts. So, how does a stealthy outlaw deal with them?
-
If Kay has acquired the Electro-Shock Prod gear piece, she can use it for silent droid takedowns.
-
If not, the best strategy is to avoid their patrol routes entirely, using cover and timing movements carefully.
Once the relic is in hand, the quest marker will update, guiding Kay to a new exit located upstairs. The final step is a return to Queen Ashiga to deliver the stolen artifact, successfully concluding 'The Safecracker' and (hopefully) earning a handsome reward for the trouble. This quest perfectly encapsulates the core Outlaws experience: reputation opens some doors, but ingenuity and stealth are the ultimate keys to the galaxy's greatest treasures.