
The Ultimate Star Wars Outlaws Heist Guide: Pulling Off The Galaxy's Biggest Score
Alright folks, let me tell you, pulling off the big score in Star Wars Outlaws is no walk in the park. It's the ultimate test of all the skills you've honed across the galaxy. After assembling my crew and getting my gear just right, it was go time for the legendary heist on Sliro Barsha's Canto Bight mansion. No turning back, no last-minute supply runs—just you, your team, and one of the most intense sequences in modern gaming. Buckle up, because I'm about to walk you through every twist, turn, and firefight.
How To Infiltrate The Mansion
It all kicks off back at the Broken Hoof. Chat with ND-5 to get the ball rolling, but I highly recommend having a final word with your crew—Riko, Bram, and Jaylen—for some great character moments. Once you're at the cliffs, stick to the path and use the tall grass near the security building for cover. The name of the game here is stealth. You gotta take out every guard. My pro tip? Hit the alarm panels flanking the energy gate first. That way, if things go loud, you won't have the whole place on you in seconds.
If a firefight does erupt, pop that Adrenaline Rush and go to town. Watch out for the sniper on the opposite cliff—he's a real pain! Clear the area, wait by the gate for Gedeek to do his thing, and then brace yourself. The next wave knows you're coming, so don't be shy; rush in and clean house. Once it's clear, Asara will open up a hatch. Follow those green lights and climb down the ladder to the next phase.
Navigating The Ventilation Shafts: Don't Get Lost!
Inside, Riko tells you to shut down the fans. Follow her and Gedeek, but then you'll need to rappel down further on your own. At the bottom, look for a vent panel across a gap. Send Nix to open it, blast the power cell inside, and then climb the grate on your left to regroup.
The hangar is just the start of a wild ride.
This next part is a maze. Stick with Riko and Gedeek like glue. If you get separated, remember: right, then left. You'll find a room with another fan. Climb the grates to its left, cross a gap, and you'll fall into another tunnel set. Again, go right, then left. Loot a chest, crawl through a vent, and finally rappel into Sliro's hangar. Phew!
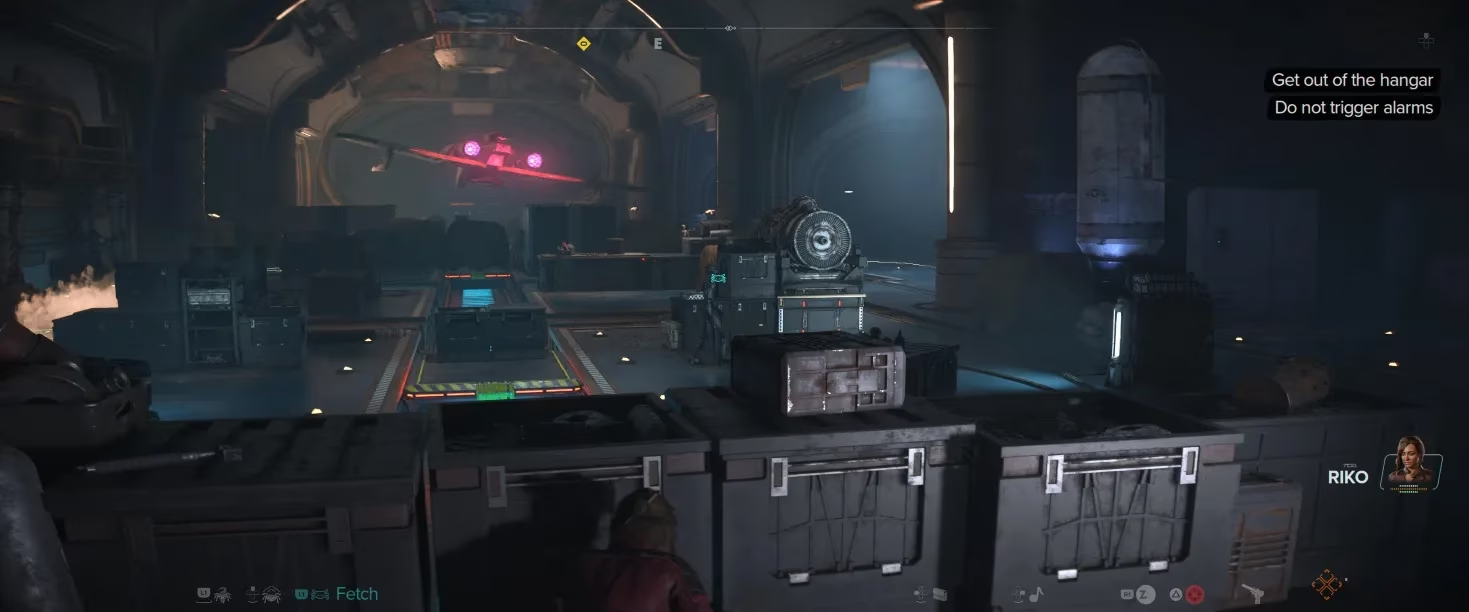
The Great Hangar Escape & Using The Old Turbolift
This hangar is a deathtrap: guards, cameras, alarms—the whole nine yards. Hug the middle of the room and use cover. The cameras are the worst; a mere glance will set off alarms, and you can't shoot them. Use Nix to disable the panels beneath them. Work your way to the far end, climb a ladder, and crawl through a vent into a storeroom for some sweet bacta and credits. Heal up, then squeeze between pipes on the right.
At the top of another ladder, patience is key. Wait for guards to split up, then pick them off one by one. Loot the room, and use an Ion Blast on the capacitor to power the old turbolift. Here's the tricky part: at the top, climb the ceiling pipes on the right. Wait for the lift to go down, power it back up, and as it rises, shoot the door's capacitor. You gotta jump onto the moving lift and sprint through the door before it shuts. Timing is everything!
Cracking Sliro's Vault & The Casino Dash
Follow your crew upstairs. After Riko disables a barrier, enter the left room, slice a terminal to kill the turrets, and approach the vault. A cutscene plays, then you plant Ank's bomb. Now, defend your position! Waves of guards and droids attack. Switch between plasma and ion shots for maximum effect. Toss grenades near the entrances to soften them up. When the heavy enforcers arrive, you're almost done.
After the vault, you're in the sewers. Follow Riko up, use an Explosive Shot on a wall left of some computers, and let Asara handle the security droid. Hop in the turbolift, and get ready to run through the casino.
In the first room, Riko slices a panel; destroy the two power cells that appear. The next room has five cells: three on the main barrier, one in each side room. Fight off Zerek Besh guards and take them all out. The third barrier has eight cells. Destroy them all, and then sprint like hell for the Trailblazer.
Infiltrating The Revelator Star Destroyer
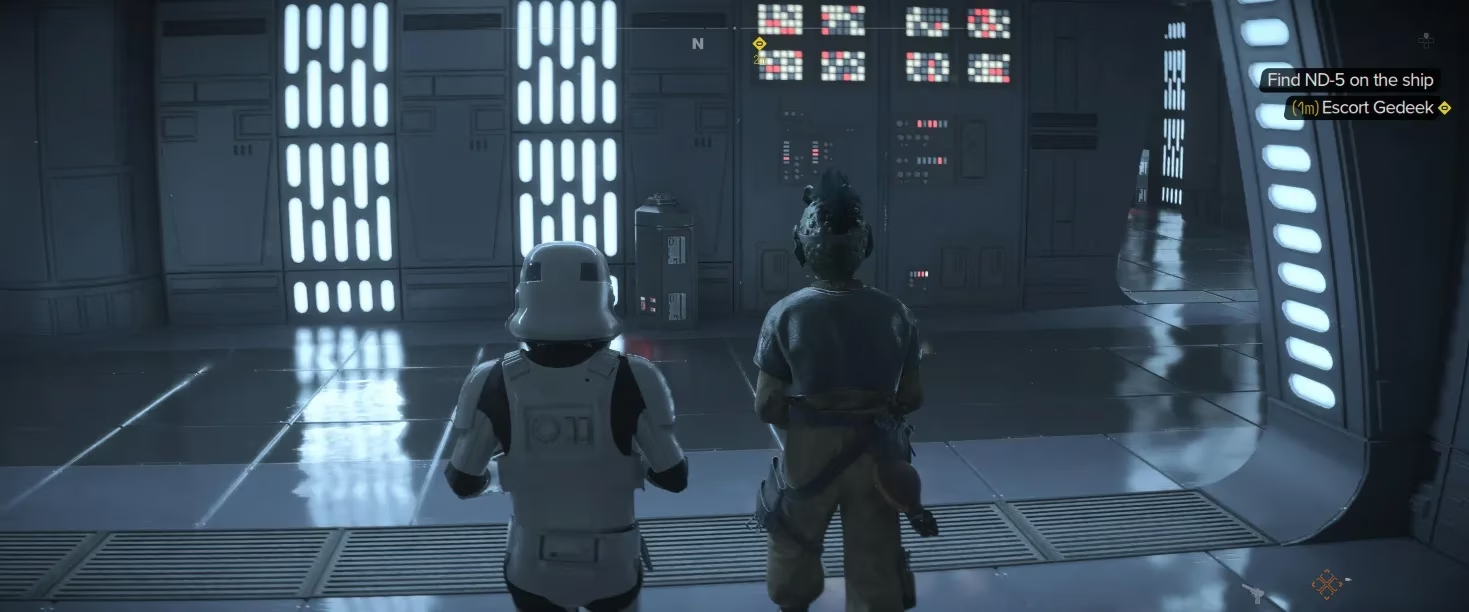
Blending in is key on the Star Destroyer.
On the Revelator, stay close to Gedeek. Your disguise is your best weapon. When questioned by an officer, telling the truth actually crafts a better cover story. Walk past cameras—no alarms—then use a terminal to disable one so Gedeek can follow. Use a stealth takedown on an officer, then when Gedeek opens a door, stick to the right and follow Sliro into a turbolift. You have about 20 seconds; walk, don't run. Then, just stick with Sliro as you did with Gedeek.
The Chase: Escaping From ND-5
After a cutscene, run forward into the vents. When you pop out, ND-5 attacks from the right—turn left immediately and sprint down the hall. Jump down a gap past a flaming gas leak, slide down, go through a door, and override the next one with your data spike.
Run to the rear right door of the next room, climb a ladder, and jump over the railing at the top. Loot if you want, but then face the railing, look left, and climb onto a platform leading to a new hall. Find a vent on the left, crawl through, turn right to the deflector shield station. Climb down, follow the path clockwise around the chamber, make a running jump to a central pillar, and climb into the vent ahead. This section is pure, adrenaline-fueled parkour.
Powering Up and The Final Confrontation
From the vent, use the main console. Gedeek says to restart two power cores. For the first one, go down the main hall, left, up a ladder. Activate the terminal, but first, you need to pull manual restart levers while evading ND-5. Hold each lever until its meter empties, then return to the terminal.
Escape through a floor hatch, run along a gantry jumping over gaps while avoiding enemy fire. Use vents to reach the second core area. This time, you need to override panels with your data spike. ND-5 attacks immediately from the right—run left and hide before attempting the panels.
With the second core up, leave through the large door, flee left, and run past shield emitters. They'll stun ND-5, triggering a climactic cutscene.
The Grand Finale: Escape From The Revelator
The final push to freedom is an all-out battle.
Follow Asara and ND-5. Have Nix press a button to drop an energy barrier. As you run, check the left side for grenades and bacta—top up! In a mechanical room, prepare for huge waves of Storm Troopers: snipers, rotary cannons, and finally, Death Troopers. The alarm's tripped, so go loud! Grab a heavy weapon and unleash hell. After the Death Troopers, take the stairs on the left to a turbolift.
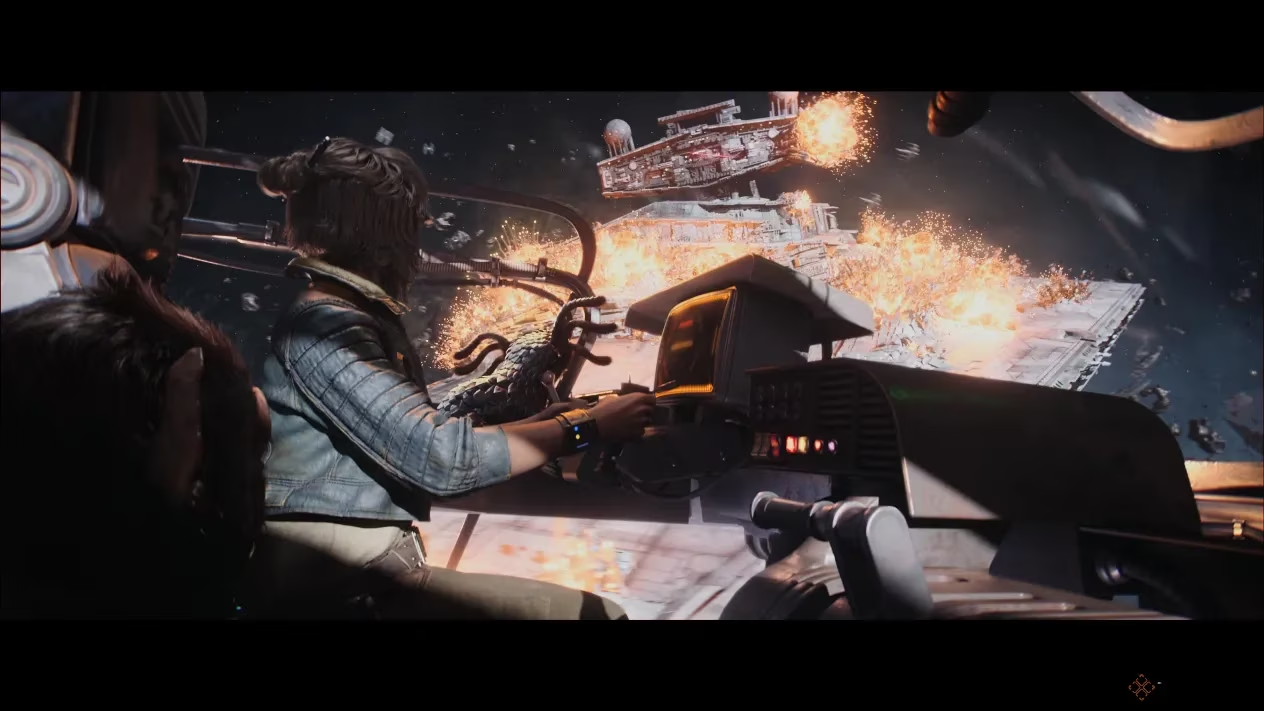
In the hangar, blast the two Storm Troopers at the bottom of the stairs and sprint straight for the Trailblazer. Don't stop to fight; it's futile. Once aboard, you're in for a space battle.
First, you're alone against TIE fighters and the Revelator's turbolasers. Thin out the TIEs and hit the turbolaser turrets with missiles. After a Gozanti Cruiser arrives, destroy it to call in Rebel and Syndicate reinforcements.
Your final objective: destroy the Star Destroyer's shield generators. As any Star Wars buff knows, they're the spherical structures on top of the command bridge. A couple of torpedoes or sustained laser fire does the trick.
With shields down, fly to the underside and target the dome covering the reactor core. No guns down there, so you can just cut engines and blast away until it's destroyed. And just like that, my friends... you've done it. The galaxy's greatest heist is complete. What a ride! 🚀